June 2008 Newsletter

June 2008 Newsletter
Issue 127
This was one of our informal quarterly meetings where our members showed off their latest Meccano creations.
At around 2:00pm we had a short committee meeting, followed by the Model Tour in which members were invited to give a short talk about their models — in particular their entries for the Secretary’s Challenge!
Written by Alan Wenbourne
Download this article in PDF format.
Introduction
I remember watching fairground dive-bombers as a child and thinking, “one day I may be clever enough and have enough Meccano to make one of these”. Later, I thought “well, it only goes round (like a windmill)”, but then it does have that clever mechanism to prevent the riders being turned upside-down. Some 50 years later my interest was renewed.
I decided to survey some Meccano literature to see what other modellers may have produced, To my surprise, I only found two references, one in the February 1951 issue of Meccano Magazine and the GMM Supermodel № 26. The former shows a low resolution picture of a fairly small model, the latter a model plan of a large complex model; both feature rotating cars and a tilting head arrangement. Since I had never seen a tilting head ride and was impressed by the GMM model, I decided to make the GMM 26 machine according to the ModelPlan.
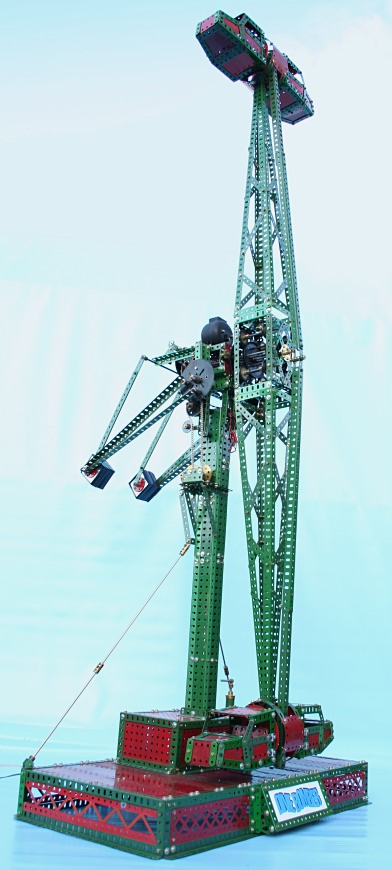
Figure 1 General view
A Brief History of the Dive Bomber Ride
Fairground Dive-Bombers first appeared in the UK in 1939 in Blackpool, based on a US patented and licensed design conceived from flight simulation machines. The original rides had a tilting boom, giving the additional horizontal plane of flight, but this feature was soon discarded. In later years, some machines were twinned to increase capacity.
The GMM SML 26 ModelPlan
This impressive model was designed and made by Mr C. Cohen of Cape Town, South Africa, pre-October 1970.
The Supermodel Leaflet was produced by G. Maurice Morris and published by The Meccanoman’s Club in October 1971, and is currently available from MW Mail Order.
The model has a number of interesting and unusual features such as the large bearing arrangement supporting the main arms with cars. A standard axle rod would be inadequate for carrying such a large mass cantilevered from the tilting head, so a large diameter bearing, consisting of two 3” pulleys supported by eight axle rods journalled through their the round holes forms the hub, around which eight 1” pulleys with rubber rings roll in the grooves of the 3” pulleys, thus carrying the arms.
All the electrical switching is constructed from Elektrikit parts.
The cars oscillate 180° per arm revolution to avoid inversion of the occupants. This is achieved by two external links connected to a crank on the central shaft; the links drive cranks at the car ends through 90° oscillation, which is multiplied to 180° by 1:2 gearing.
The model is 5’ 6” (1.67m) tall and in the 1000 nut and bolt class.
The Meccano Model
Two things struck me about the plan model; there is no facility for riders to board the cars, and using an E020 motor means that the riders would only experience one direction of rotation. Therefore, one set of riders would only travel backwards! I seem to remember the actual rides were reversible to give all riders a common experience.
However, the model is said to be for exhibition purposes, so these small criticisms did not deter me from making this excellent example, so I set out to construct it strictly to the plan.
Although, at first sight, the instructions and drawings appeared challenging, they proved very easy to follow making the model a pleasant and rewarding experience to build.
Figure 1 above is a general view of my completed model.
Watch our video of this model
Changes and Modifications to the ModelPlan
Despite my original intention, some changes proved necessary or desirable as follows:
- Not having a Meccano PDU, I used a 12/24V DC MFA motor for the tilting drive (figure 2).
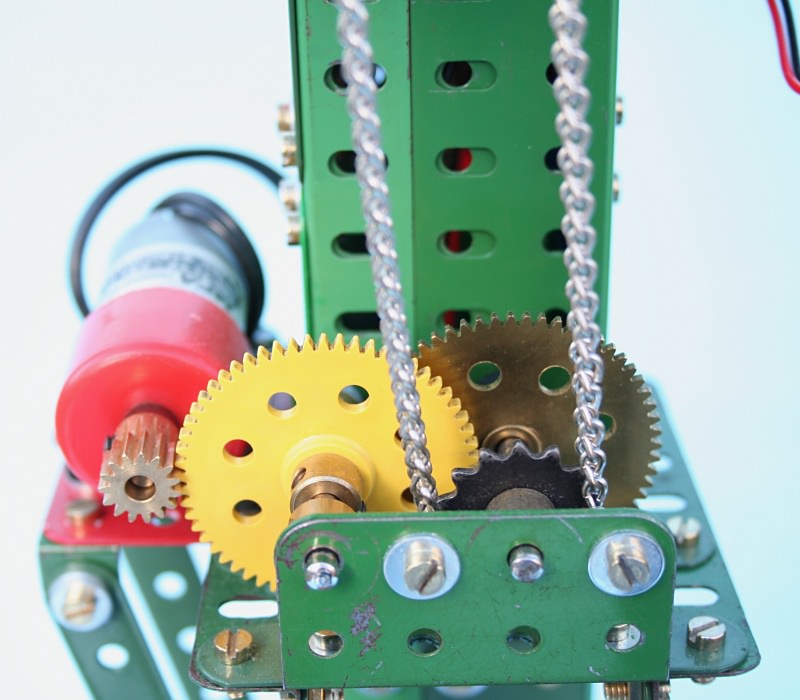
Figure 2 MFA motor and tilt drive
- I dispensed with the primary and secondary chain drives in the main arm rotation drive, as these would have eventually jumped off their sprockets at maximum head tilt angle (horizontal arm rotation), due to chain rotation in the horizontal plane. The primary chain drive is replaced with a 95/19, 5:1 ratio reduction gear and the secondary chain drive replaced with an additional 60/15. 4:1 ratio reduction gear (figure 3). The difference is a 6% speed increase, which is hardly noticeable.
- To tolerate any misalignment and provide some torsional resilience, I fitted one of my own design flexible couplings (see issue 48 of The International Meccanoman) to the E020 motor shaft (figure 3).
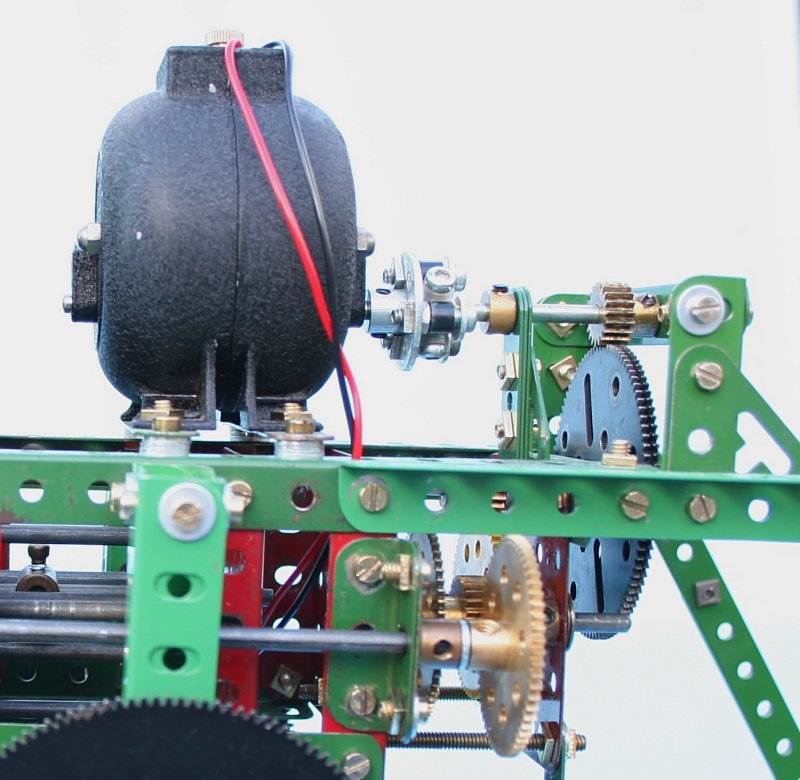
Figure 3 Motor coupling and primary reduction gearing
- I designed a stiffer main arm thrust bearing arrangement by cross bracing the outer face of the arm, which supports a wheel disc. The inner face bears against a ½” plastic pulley backed by a collar on the central shaft (figure 4).
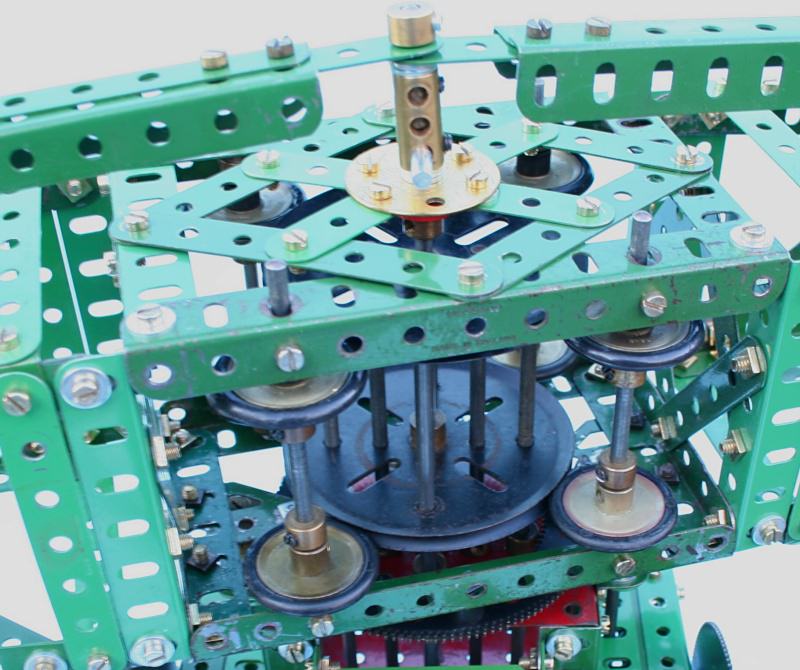
Figure 4 Arm thrust and rarial bearings in full tilt mode
- I added a 25-tooth pinion as an idler, 180° opposite the main arm drive pinion as extra support for the ring gear. The idea being to resist any tendency for the 25-tooth drive pinion jumping tooth mesh with the ring gear (figure 5).
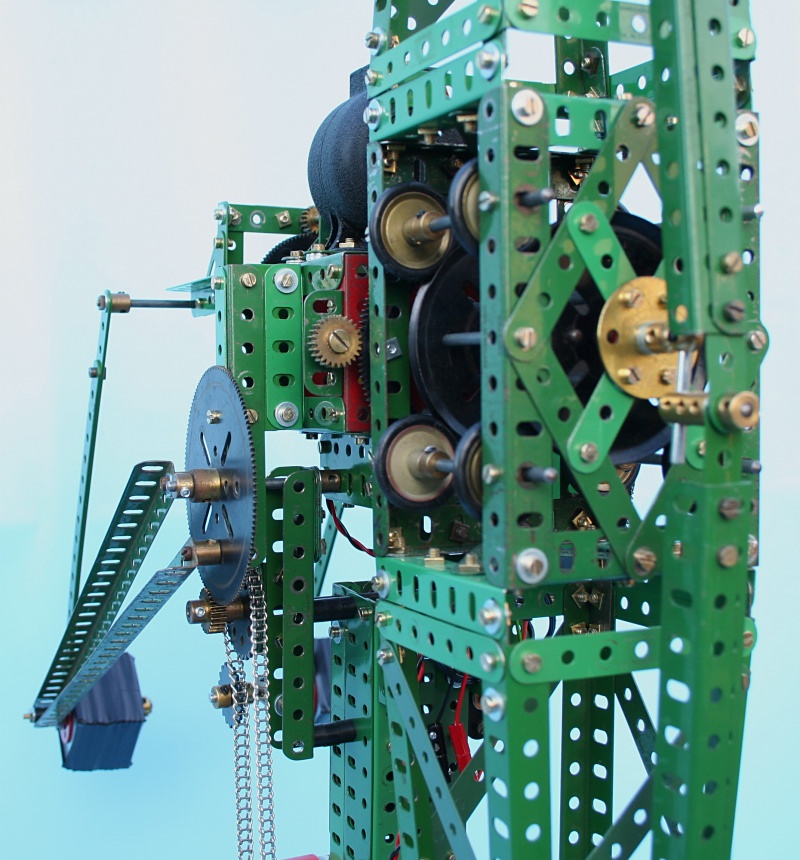
Figure 5 Main drive support idler gear and tilt drive idler sprocket
- I chose to use a boiler, plus ends, filled with axle rods as a counterweight, but the tilting motion proved somewhat violent. The reason being that because the centre of gravity of the tilting mass is some 4” away from the tilt axis and above the tilt axis at half tilt, movement either way of this mid-position caused the motor to loose control, with the tilting mass falling against the stops with some force, causing the whole model to sway and rock alarmingly! Experimentation with two separate counterweights, of similar total mass to the original, located at a 12” radius, approximately 30 degrees below the horizontal, which would pass forward of the pillar at full tilt, proved much more effective. Each of these counterweights consists of twelve 2” square x 1/8” thick steel plate washers mounted on large axle bush wheels and collars and fixed to each arm. The arms are 12½” angle girders spaced from and attached to the 3½” gears by threaded bosses, such that the weights clear the pillar and tilt drive components. Additional bracing of the counterweight arms is by strips back to the original mounting frame (figures 6 and 7).
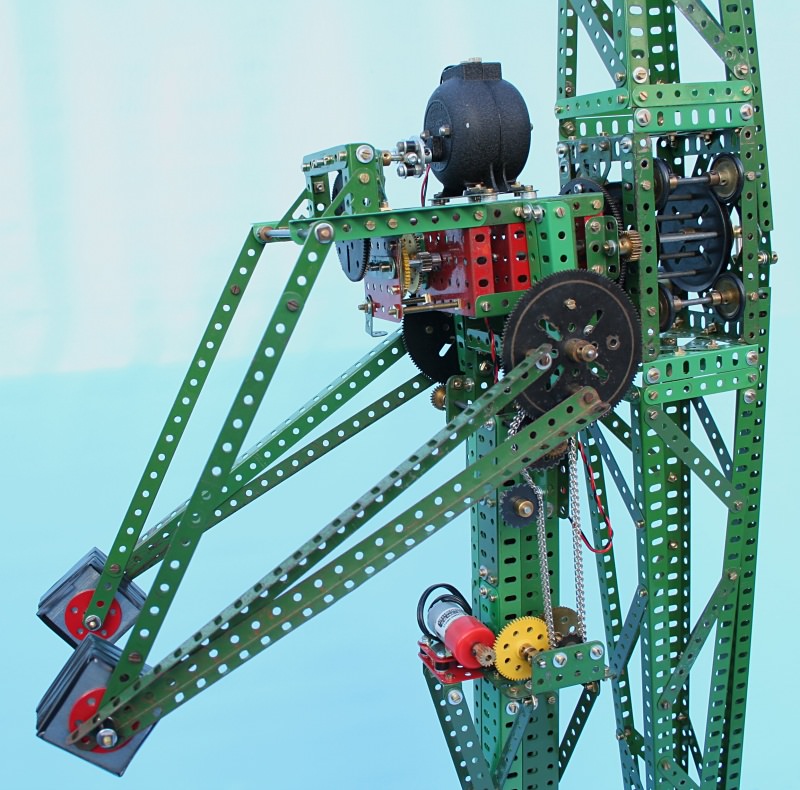
Figure 6 Side view of revised counterweight arrangement
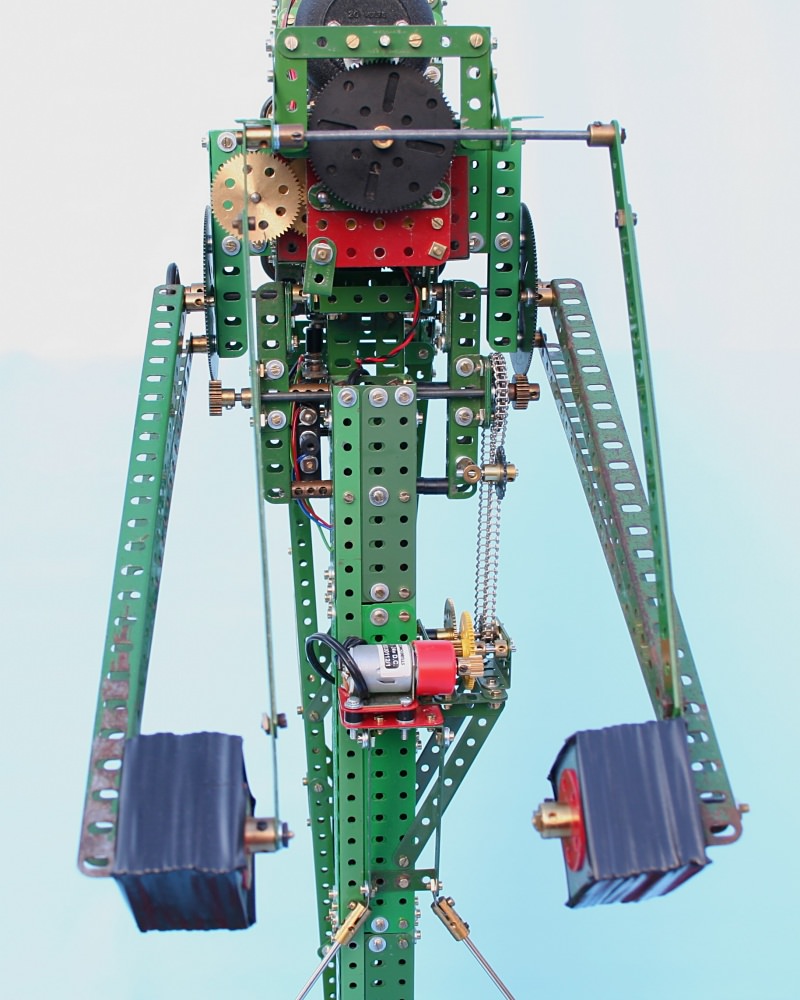
Figure 7 Rear view of revised counterweight arrangement
- An idler sprocket was fitted to the tilt mechanism chain drive to take up the slack and improve tilt control (figure 5). The tilting drive was now much steadier and stable with the tilt motor running on only 7.5V.
- In order to ease dismantling and reassembly for transportation, the tilt axis support arms at the top of the pillar were fitted with single arm cranks (one of which can be seen in figure 5) to provide axial location of the tilt head, thereby avoiding the need to insert collars as spacers, whilst holding the arm structure aloft during assembly. A longer tilt axis axle rod has a 1” pulley and tyre secured to one end to aid grip during extraction and assembly, a collar constrains the other end.
- To further aid assembly and dismantling for transportation, the cars are attached to tri-flat axles, and carefully selected bush wheels fitted to the cars such that the flats of the axle rods control the correct roll attitude of the cars.
- The pillar stays were shortened and re-located lower down the pillar (figure 1) to allow passage of the counterweights past of the pillar in tilt mode.
Afterthoughts
- Although the large bearing is an innovative solution using standard parts, it does allow some extraneous movements due to its use of rubber elements and operating clearances. Dependant upon its durability in demonstrations, I may consider changing it in favour of the now available large axle parts.
- In moving the model, the pillar can be disturbed from true upright because it is only secured in one plane, just below the upper base. If the pillar were made 3½” longer (by staggering and overlapping its components) it could extend below the upper base and secured in an additional plane just below the main base, providing much better stability and resistance to movement.
- A quieter reversible DC motor could replace the E020 motor.
Other Detail
This is shown in the following pictures and captioned accordingly.
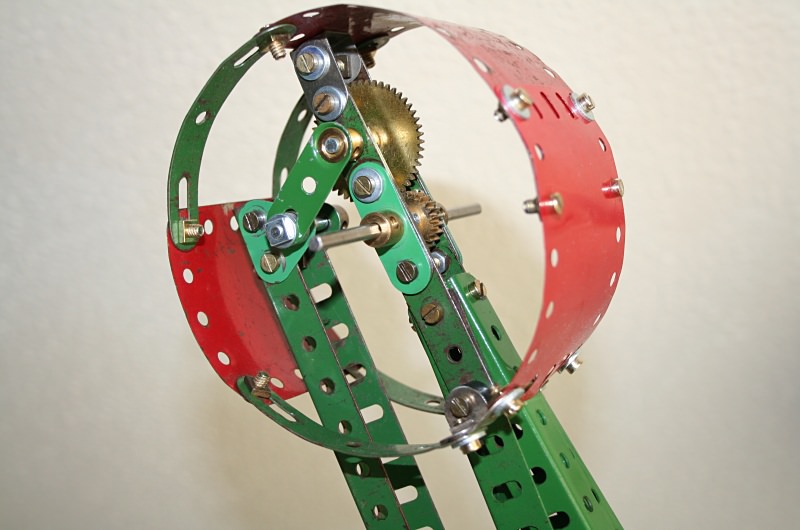
Figure 8 Car oscillation drive
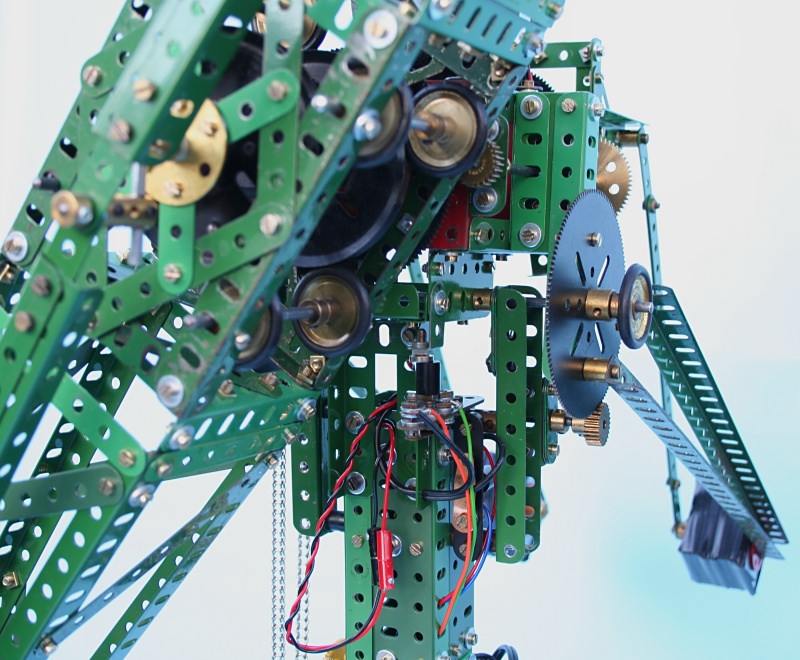
Figure 9 Home and tilt limit switches

Figure 10 Underside view of Elektrikit switches and wiring
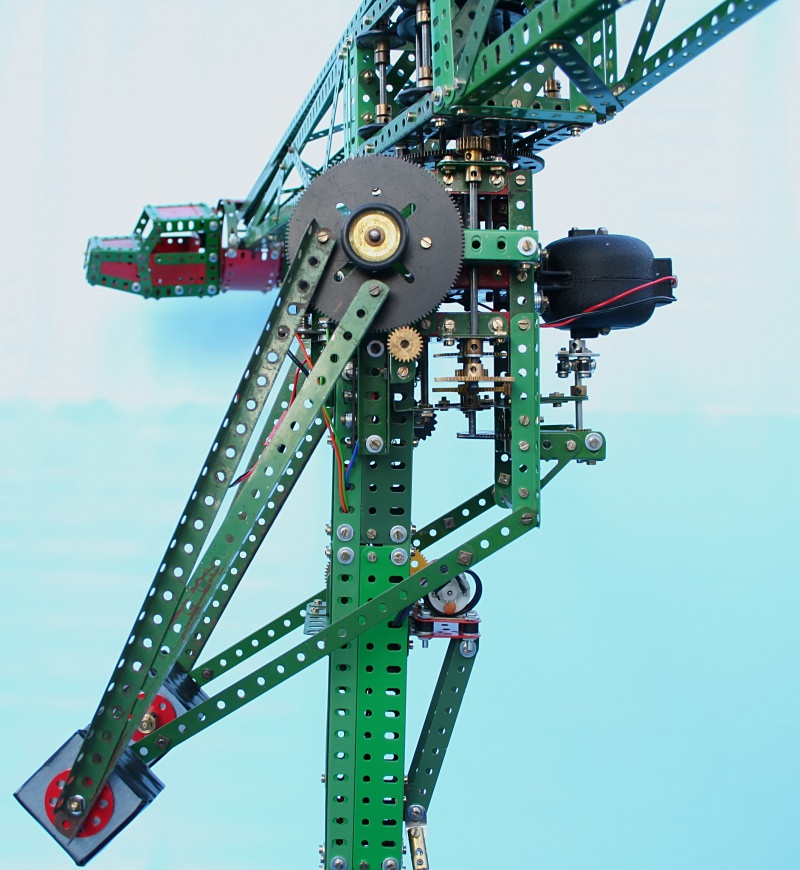
Figure 11 Full tilt position
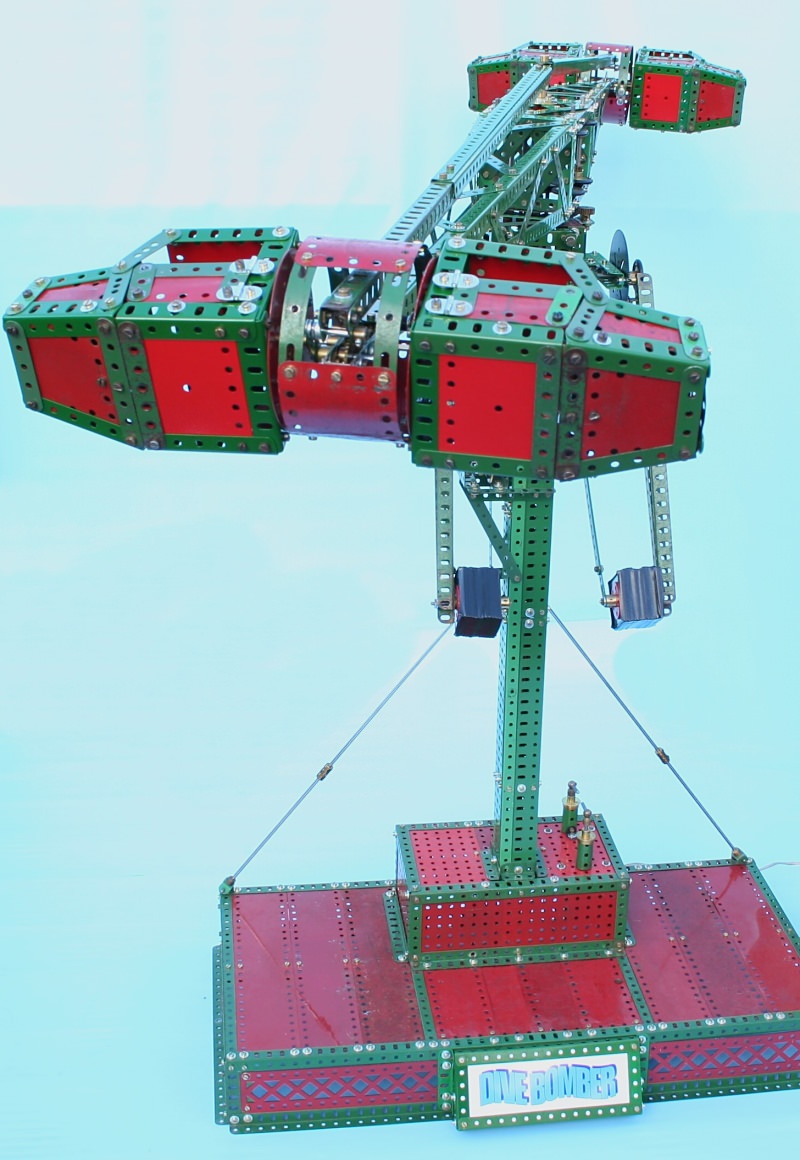
Figure 12 Flat out!
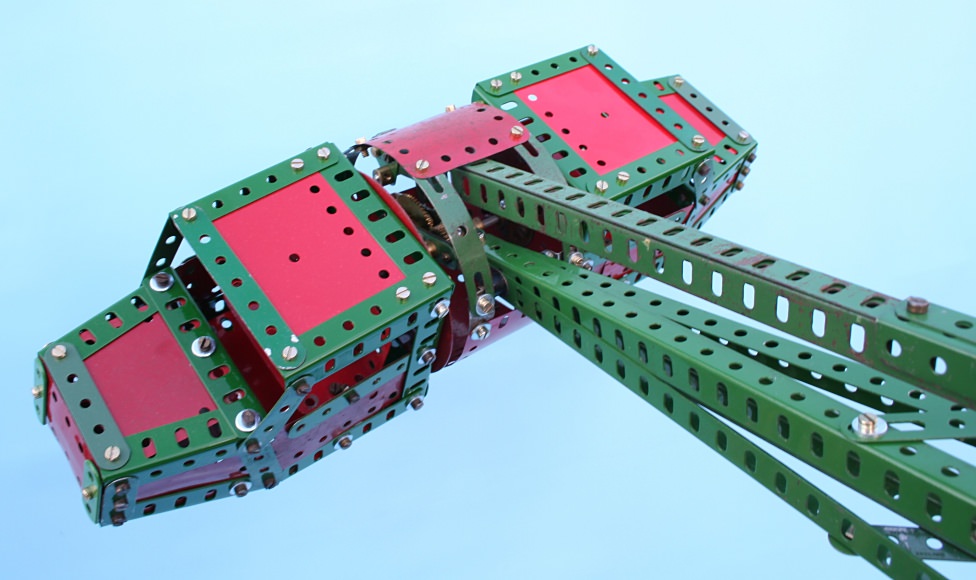
Figure 13 Flying
See more photos of this model.
This article © 2008 Alan Wenbourne.